
So recently Shelby at Promise Land Tannery had a tanned cape sale (Her dA. Her etsy. Her site.) Since her products are top notch, I always watch for these sales, and sometimes find myself starting an unexpected project.
This time, she had a small tanned goat cape... in black. Normally I'm not a huge fan of hoofed animals, or gameheads, but a black goat? How metal...
But it was "small" with no measurements? How small was small? What form should I get (because I'm not wrapping or carving this)? And would I need horns? Did she have some? Long story short I scoured ebay and taxi.net for some horns, found some earliners and eyes, and Shelby told me I could get a Spanish Goat form and size it down, and I found a Van Dykes form that was more interesting than usual. So Necrogoat was a go, and packages started coming in with goat things.
When the cape and form were finally in the same room, I tried an initial test fit before modifying the form so that I could get an idea how much I'd have to modify the form, and took some rough measurements even though measurements on a cape alone aren't as useful as measurements from the actual animal. The results were surprising, but I won't bore you with details. Here's a dramatic taste.
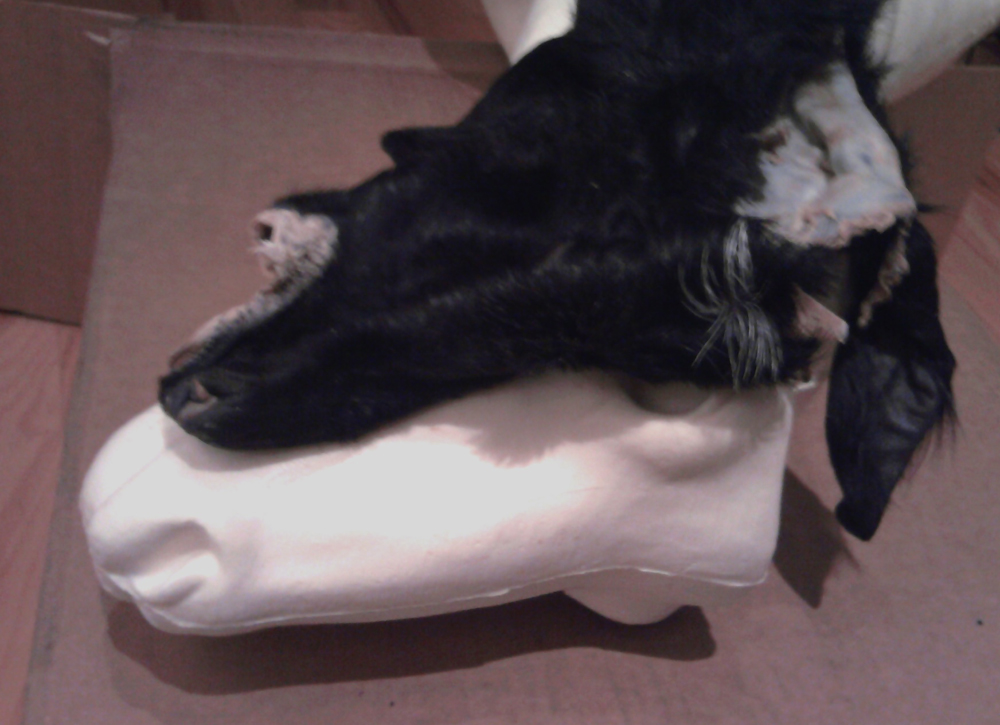
The horn area is lined up on both, the lower margin of the lower jaw is lined up. We're looking at about 2 inches too long on the face lengthwise, quite a bit on height as well... and the neck was measured from the cape at 10 inches while the manikin had about 20 inch circumference. So I was essentially trying to fit a baby sock on an adult foot.
Here's how I marked up the head to piece it back together later.


We have blue lines for posterior to anterior alignment and red marks for lateral to dorsal alignment, and black sharpie for where to cut.
After a fun evening with my Japanese saw, this was the result:

When working on the head, I was mostly focused on the nose and jaw, and less on the eye/ear/horn area. The initial horns I ordered were far too big for the specimen, and the smaller horns I managed to procure are still in the mail as of right now. I knew that the forehead area was going to end up a bit big but I'd worry about that when the horns came in.
So I used Bondo to glue the pieces of the face back together. I had heard the glory of Bondo proclaimed on all sorts of Taxidermy related threads, but hadn't tried it so I figured this would be a good chance. I was not prepared for the smell. Sure, there's a warning on the back. Sure, it's magic in a can/tube. But WOW, open a window at least and get a fan pumping it out.
Here's the initial result of the head:

 Also notice that I lined up the blue and red lines despite the form irregularities. I can sand away the form problems, but the guidelines I made in the beginning will keep the core structure the same. In order to sand this, I am using metal rasps like this one for the large areas and stone carving raps such as these for detail, and finally a double sided rasp with a fine end to smooth out the lines left by the more harsh rasps. All of these I bought for stone carving, initially, but they seem to work extremely well on foam. The goal here was to eliminate the uneven areas where the pieces of foam meet, while maintaining the original anatomy. I did lose some detail, but I can recarve when I am sure the cape matches the form in size, rather than expend the extra energy making sure all those chin bumps exist...
When I finished evening out the forms, I filled the gaps with a little bit of Aves ClayShay, which essentially is a powder that creates a light, easily workable mache when mixed with water. I sanded that down and got this:

Despite the missing detail, I'm pretty happy with the initial result. I will add more detail back into the form when I know the cape fits. I have not done much with the upper neck, even though I know it will need to be taken down in circumference. The goal is to fix the lower neck, then bondo the upper to it and then sand to fit. The sanding is easier than the cutting, surprisingly.
So the bottom neck I cut from its plywood base, which I will reconstruct when I know I won't need to remove any more length, then roughly measured how much I would need to take away, and cut it into four pieces. the shape of the neck muscles are several ovals smashed together, so it isn't possible to just cut from one direction without getting a severely warped shape. Keep this in mind when you're cutting anything irregular. Here is the neck cut and glued back together.

You can see the areas it doesn't match up perfectly here. All of those were sanded to match, then smoothed with mache as before.


Pretty elegant looking. Now lets bondo the head back on and sand the two pieces to match!

OH FFFFFFFFFFFFFFUUUUUUUUUUUUUUUUUU
Well I did it. I got the two to match.


Here's how it looks today. Yeah, the forehead needs work, but the horns aren't in yet, the back of the braincase needs work too. So do the eyes. And the earbutts. And the nose, I haven't touched the nose since I cut it in half. And... well lets just see how the cape fits now and then we'll decide what to work on first.


Awesome. More to come.
No comments:
Post a Comment